Introduction
The Anypoint Connector for Apache Kafka allows you to interact with the Apache Kafka messaging system, enabling seamless integration between your Mule applications and an Apache Kafka cluster, using Mule runtime.
Read through this user guide to understand how to set up and configure a basic Mule flow with the Apache Kafka connector.
| Track feature additions, compatibility, limitations and API version updates with each release of the connector using the Connector Release Notes. Review the connector operations and functionality using the Technical Reference alongside the Demo Mule Applications Using the Connector. |
MuleSoft maintains this connector under the Select support policy.
Prerequisites
This document assumes you are familiar with Mule, Anypoint Connectors, and Anypoint Studio Essentials To increase your familiarity with Studio, consider completing one or more Anypoint Studio Tutorials. Further, this page assumes that you have a basic understanding of Mule Flows and Global Elements.
Hardware and Software Requirements
For hardware and software requirements, please visit Mule Hardware and Software Requirements page.
Compatibility
| Application/Service | Version |
|---|---|
Mule Runtime |
3.7.0 and higher |
Apache Kafka |
0.10.2.0 |
Install the Kafka Connector
You can install this connector in Anypoint Studio using the instructions in Installing a Connector from Anypoint Exchange.
Configure the Kafka Connector Global Element
To use the Apache Kafka connector in your Mule application, you must first configure a global element for the Kafka connector. We show you how this is done using the Anypoint Studio UI.
|
This global element can be used by all the Kafka connectors in the application (read more about global elements). Not all connector instances necessarily use the same global element/configuration. It is not uncommon to have multiple connectors in a flow, using different global elements/configurations to connect to one or different instances. |
You must provide connection and other details in the Global Element Properties window - these settings are saved in a global element and referenced by applicable connector instances:
.properties file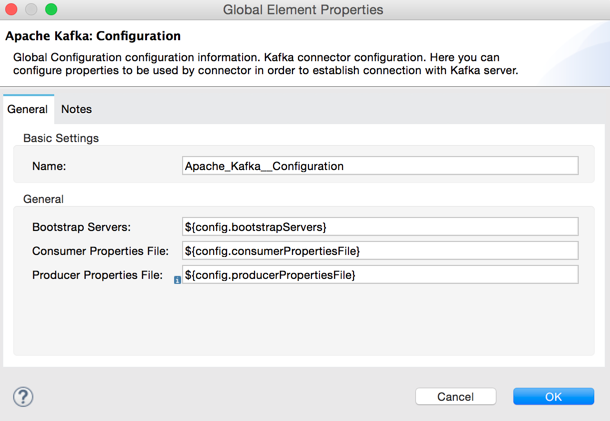
|
In the image above, the placeholder values refer to values saved in a For easy maintenance and re-usability of your connector properties, we recommend that you use a |
Global Element Properties for Kafka Connector
| Field | Description |
|---|---|
Name |
Enter a name for this connector configuration to be able to reference it later. |
Bootstrap Servers |
Comma-separated host-port pairs for establishing the initial connection to the Kafka cluster — same as |
Consumer Properties File |
Path to properties file where you can set the Consumer — similar to what you provide to Kafka command line tools. If you do not specify a value for |
Producer Properties File |
Path to properties file where you can set the producer — similar to what you provide to Kafka command line tools. If you do not specify a value for |
Using the Kafka Connector
|
A Kafka connector is based on the concept of the endpoint. The global element can be configured either as an:
|
Connector Namespace and Schema
When designing your application in Studio, the act of dragging the connector from the palette onto the Anypoint Studio canvas should automatically populate the Mule application’s XML code with the connector namespace and schema location.
Namespace:
xmlns:apachekafka="http://www.mulesoft.org/schema/mule/apachekafka"Schema Location:
xsi:schemaLocation="http://www.mulesoft.org/schema/mule/apachekafka http://www.mulesoft.org/schema/mule/sfdc-composite/current/mule-apachekafka.xsd"
If you are manually coding the Mule application in Studio’s XML editor or other text editor, define the namespace and schema location in the header of your Configuration XML, inside the <mule> tag.
|
  1
2
3
4
5
6
7
8
9
10
11

  <mule xmlns="http://www.mulesoft.org/schema/mule/core"
      xmlns:xsi="http://www.w3.org/2001/XMLSchema-instance"
      xmlns:apachekafka="http://www.mulesoft.org/schema/mule/apachekafka"
      xsi:schemaLocation="
               http://www.mulesoft.org/schema/mule/core
               http://www.mulesoft.org/schema/mule/core/current/mule.xsd
               http://www.mulesoft.org/schema/mule/apachekafka http://www.mulesoft.org/schema/mule/apachekafka/current/mule-apachekafka.xsd">

      <!-- put your global configuration elements and flows here -->

</mule>
Using the Connector in a Mavenized Mule App
If you are coding a Mavenized Mule application, this XML snippet must be included in your pom.xml file.
  1
2
3
4
5

  <dependency>
        <groupId>org.mule.modules</groupId>
  <artifactId>mule-module-kafka</artifactId>
  <version>2.0.0</version>
</dependency>
|
Inside the
|
Kafka Connector Example Use Cases
The example use case walkthroughs are geared toward Anypoint Studio users. For those writing and configuring the application in XML, jump straight to the example Mule application XML code to Consume Messages or Publish Messages to see how the Kafka global element and the connector are configured in the XML in each use case.
Consume Messages from Kafka Topic
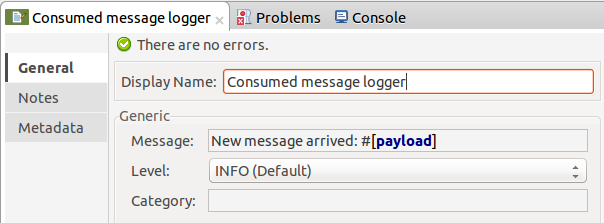
See how to use the connector to consume messages from a topic and log each consumed message to console in the following format: "New message arrived: <message>".
-
Create a new Mule Project by clicking on File > New > Mule Project.
-
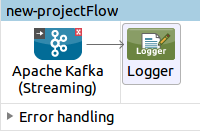
With your project open, search the Studio palette for the Kafka connector you should have already installed. Drag and drop a new Apache Kafka connector onto the canvas.
The Kafka Connector is going to be configured to consume messages from a topic in this case. -
Drag and drop a Logger after the Apache Kafka element to log incoming messages in the console.
-
Double click on the flow’s header and rename it
consumer-flow.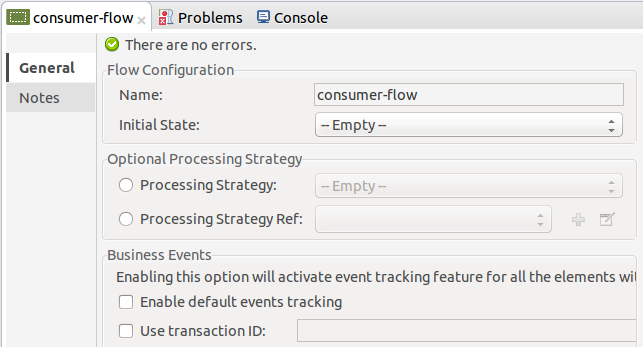
-
Double click on the Apache Kafka connector element, and configure its properties as below.
Field Value Display Name
Kafka consumer
Consumer Configuration
"Apache_Kafka__Configuration" (default name of a configuration, or any other configuration that you configured as explained in Configuration section
Operation
Consumer
Topic
${consumer.topic}Partitions
${consumer.topic.partitions}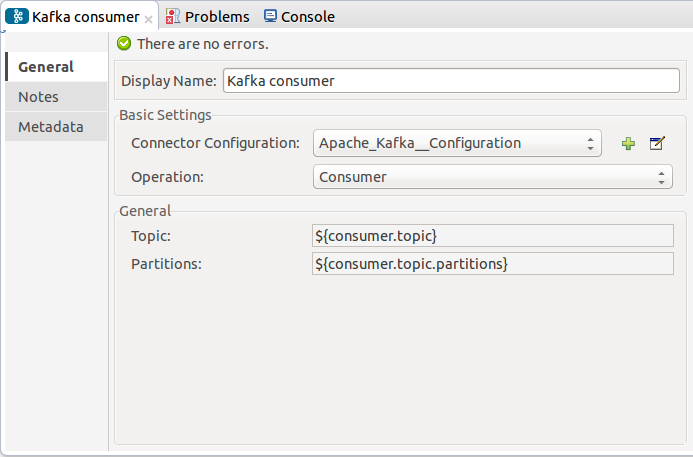
-
Select the logger and set its fields like so:
-
Enter your valid Apache Kafka properties in
/src/main/app/mule-app.propertiesand identify them there using property placeholders:-
If you configured Kafka global element as explained within the Configure the Kafka Connector Global Element section then provide values for
config.bootstrapServers,config.consumerPropertiesFileandconfig.producerPropertiesFile. -
Set
consumer.topicto the name of an existing topic that you want to consume messages from. -
Set
consumer.topic.partitionsto the number of partitions that you have set at topic creation for the topic that you want to consume messages from.
-
-
Now you should be ready to deploy the app on Studio’s embedded Mule runtime (Run As > Mule Application). When a new message is pushed into the topic you set
consumer.topicto, you should see it logged in the console.
Consume Messages from Kafka Topic - XML
Run this Mule application featuring the connector as a consumer using the full XML code that would be generated by the Studio work you did in the previous section:
  1
2
3
4
5
6
7
8
9
10
11
12
13
14

  <?xml version="1.0" encoding="UTF-8"?>

<mule xmlns:apachekafka="http://www.mulesoft.org/schema/mule/apachekafka" xmlns="http://www.mulesoft.org/schema/mule/core" xmlns:doc="http://www.mulesoft.org/schema/mule/documentation"
        xmlns:spring="http://www.springframework.org/schema/beans"
        xmlns:xsi="http://www.w3.org/2001/XMLSchema-instance"
        xsi:schemaLocation="http://www.springframework.org/schema/beans http://www.springframework.org/schema/beans/spring-beans-current.xsd
http://www.mulesoft.org/schema/mule/core http://www.mulesoft.org/schema/mule/core/current/mule.xsd
http://www.mulesoft.org/schema/mule/apachekafka http://www.mulesoft.org/schema/mule/apachekafka/current/mule-apachekafka.xsd">
    <apachekafka:config name="Apache_Kafka__Configuration" bootstrapServers="${config.bootstrapServers}" consumerPropertiesFile="${config.consumerPropertiesFile}" producerPropertiesFile="${config.producerPropertiesFile}" doc:name="Apache Kafka: Configuration"/>
    <flow name="new-projectFlow">
        <apachekafka:consumer config-ref="Apache_Kafka__Configuration" topic="${consumer.topic}" partitions="${consumer.topic.partitions}" doc:name="Kafka consumer"/>
        <logger message="New message arrived: #[payload]" level="INFO" doc:name="Consumed message logger"/>
    </flow>
</mule>
Publish Messages to Kafka Topic
Use the connector to publish messages to a topic.
-
Create a new Mule Project by clicking on File > New > Mule Project.
-
Navigate through the project’s structure and double-click on
src/main/app/project-name.xmland follow the steps below: -
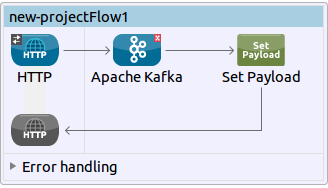
Drag and drop a new HTTP element onto the canvas. This element is going to be the entry point for the flow and will provide data to be sent to the topic.
-
Drag and drop a new Apache Kafka element after the HTTP listener.
-
Drag and drop a new Set Payload element after Apache Kafka. This Set Payload element is going to set the response to the HTTP request.
-
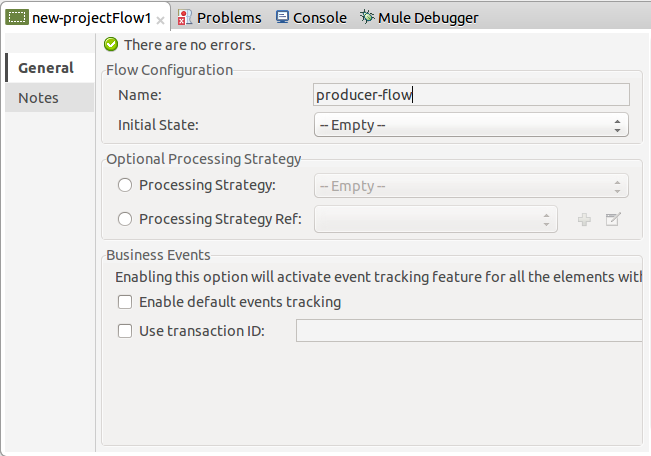
Double click on flow header (blue line) and change the name of the flow to "producer-flow".
-
Select the HTTP element.
-
Click on the plus sign next to the "Connector Configuration" dropdown.
-
A pop-up appears, accept the default configurations and click OK.
-
Set Path to
push. -
Set Display Name to
Push http endpoint.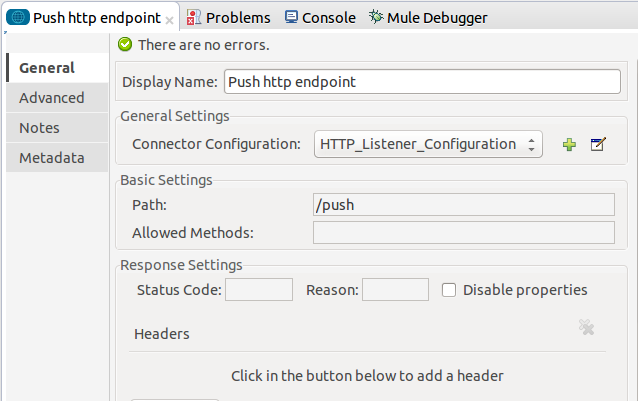
-
Select the Apache Kafka connector and set its properties as below:
Display Name Kafka producer Consumer Configuration
"Apache_Kafka__Configuration" (default name of a configuration, or any other configuration that you configured as explained in Configuring the Kafka Connector Global Element section)
Operation
Producer
Topic
#[payload.topic]Key
#[server.dateTime.getMilliSeconds()]Message
#[payload.message] -
For the Set Payload element:
-
Set Display Name to
Set push response -
Set Value to
Message successfully sent.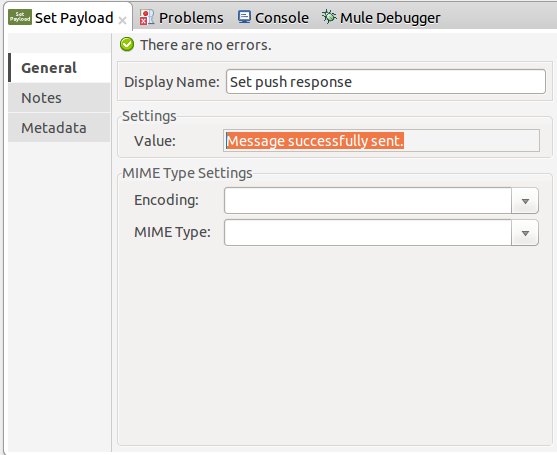
-
-
Now we have to provide values for placeholders.
-
Open
/src/main/app/mule-app.propertiesand provide values for following properties:-
If you configured the Kafka global element as explained within the Configuration section then provide values for
config.bootstrapServers,config.consumerPropertiesFileandconfig.producerPropertiesFile
-
-
Now you can deploy the app. (Run As > Mule Application)
-
In order to trigger the flow and push a message to a topic, use an HTTP client app and send a POST request with content-type "application/x-www-form-urlencoded" and body in urlencoded format to
localhost:8081/push. The request should contain values for topic and message.
|
You may use the following CURL command: |
Publish Messages to Kafka Topic - XML
Run this application featuring the connector as a message publisher using the full XML code that would be generated by the Studio work you did in the previous section:
  1
2
3
4
5
6
7
8
9
10
11
12
13
14
15
16
17

  <?xml version="1.0" encoding="UTF-8"?>

<mule xmlns:http="http://www.mulesoft.org/schema/mule/http" xmlns:apachekafka="http://www.mulesoft.org/schema/mule/apachekafka" xmlns="http://www.mulesoft.org/schema/mule/core" xmlns:doc="http://www.mulesoft.org/schema/mule/documentation"
        xmlns:spring="http://www.springframework.org/schema/beans"
        xmlns:xsi="http://www.w3.org/2001/XMLSchema-instance"
        xsi:schemaLocation="http://www.springframework.org/schema/beans http://www.springframework.org/schema/beans/spring-beans-current.xsd
http://www.mulesoft.org/schema/mule/core http://www.mulesoft.org/schema/mule/core/current/mule.xsd
http://www.mulesoft.org/schema/mule/apachekafka http://www.mulesoft.org/schema/mule/apachekafka/current/mule-apachekafka.xsd
http://www.mulesoft.org/schema/mule/http http://www.mulesoft.org/schema/mule/http/current/mule-http.xsd">
    <apachekafka:config name="Apache_Kafka__Configuration" bootstrapServers="${config.bootstrapServers}" consumerPropertiesFile="${config.consumerPropertiesFile}" producerPropertiesFile="${config.producerPropertiesFile}" doc:name="Apache Kafka: Configuration"/>
    <http:listener-config name="HTTP_Listener_Configuration" host="0.0.0.0" port="8081" doc:name="HTTP Listener Configuration"/>
    <flow name="producer-flow">
        <http:listener config-ref="HTTP_Listener_Configuration" path="/push" doc:name="Push http endpoint"/>
        <apachekafka:producer config-ref="Apache_Kafka__Configuration" topic="#[payload.topic]" key="#[server.dateTime.getMilliSeconds()]" message="#[payload.message]" doc:name="Apache Kafka"/>
        <set-payload value="Message successfully sent." doc:name="Set push response"/>
    </flow>
</mule>
See Also
-
Access the Apache Kafka Connector Release Notes.
-
Read more about Anypoint Connectors.
-
See the Apache Kafka documentation