MongoDB Connector User’s Guide
MongoDB is a cross-platform document-oriented database. Classified as a NoSQL database, MongoDB eschews the traditional table-based relational database structure in favor of JSON-like documents with dynamic schemas (MongoDB calls the format BSON), making the integration of data in certain types of applications easier and faster.
Contents:
-
Introduction
-
Prerequisites
-
Requirements
-
Dependencies
-
Versions
-
Consumers
-
-
-
Installing & Configuring
-
Installing
-
Configuring
-
Upgrading from a Previous Version
-
-
Using the Connector
-
Use Cases and Demos
-
Best Practices
-
Tips
-
Integration Patterns
-
Adding to a Flow
-
Query Types
-
Increasing Performance
-
-
Example Use Case
-
Anypoint™ Studio Visual Editor | XML Editor
-
Example Code
-
-
Demo
-
F.A.Q
-
See Also
Introduction
MongoDB Connector is a closed source connector which provides a connection between Mule and third party software MongoDB server. It implements the MongoDB v3.0 API modules and it also include different types of transformers for data management.
MongoDB Connector is an SDK-based connector developed with DevKit 3.7.1.
Prerequisites
This document assumes that you are familiar with MongoDB API. To use the this connector, you will need:
-
A MongoDB instance.
-
A set of valid credentials, including the required MongoDB endpoints, pointing to your instance.
-
A MuleSoft Enterprise License
Requirements
For Hardware and software requirements please vist Mulesoft.com
Dependencies
The MongoDB connector requires the following dependencies:
| Application/Service | Version |
|---|---|
Anypoint Studio |
3.7 |
Mule Runtime |
EE3.6.0 and above |
MongoDB |
3.0 and above |
Java |
JDK 7 and above |
Installing and Configuring
Installing
To install the MongoDB Connector:
-
Open Anypoint Studio and got to Help → Install New Software
-
Select Anypoint Connectors Update Site - http://repository.mulesoft.org/connectors/releases/3.5.0
-
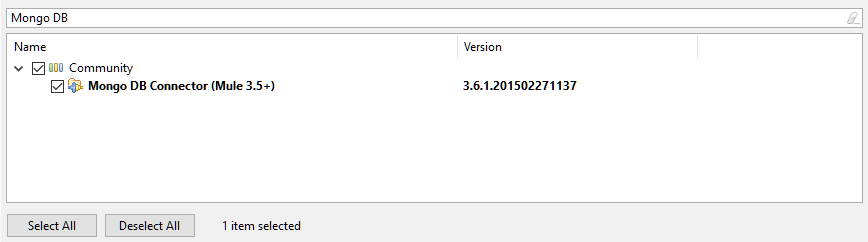
Locate the MongoDB Connector Warning: Old picture, Mongo will be a Select Connector and Version will be 4.0
-
Click Next and accept the license agreement
-
Restart Studio when prompted
For more information on how to install a connector click here.
After installing the connector, your studio palette should contain the following. It would be useful at this point to filter your palette to show only message processors relating to MongoDB Connector.
Updating From an Older Version
See Migration Guide
Using This Connector
Start by inserting:
-
Your MongoDB credentials and endpoints in a .properties file and load them using the Property Placeholder component.
-
An inbound enpoint to your flow. For e.g. HTTP.
-
A Transform Message component.

Setting up the Global Configuration
To setup the Global Configuration:
-
Go to the Global Element tab and click the Create button
-
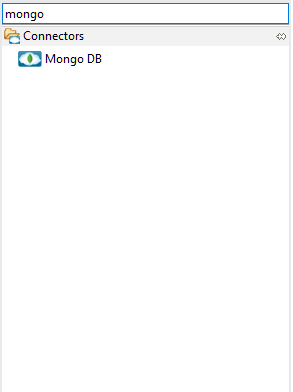
Inside the filter textbox type in "Mongo", and select MongoDB Connector Configuration.
-
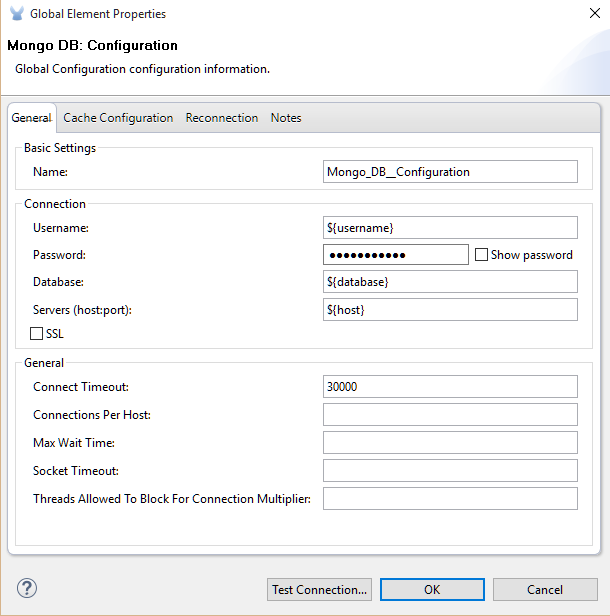
When you select the global element of your choice, you will be presented with a number of fields that you can enter.
-
The Username field refers to the username to access your MongoDB instance.
-
The Password field should contain the corresponding password.
-
You also need to specify the Database used to send and retrieve data from your MongoDB instance. Before running your application make sure that the user has the necessary permissions to do so.
-
You may also need to set the Servers property, that is composed by a host:port comma-separated list (in case you have a replica set). This attribute is optional and if left empty it defaults to localhost:27017.
-
You are able to adjust the values for the Connect Timeout, Connections Per Host, Max Wait Time and the Socket Timeout of requests that are sent to MongoDB. The default value for Connect Timeout is 30000ms. This means that any connection requests that take longer than a half minute to be sent and received will throw an exception. You can override this behaviour by setting their values to 0. This means that the MongoDB connector will wait indefinitely until a request is successfully sent and a response is received.
The following screenshot shows the MongoDB configuration with Spring properties as the field values. This is the recommended approach when you plan to deploy your application to CloudHub or to a Mule ESB server. However, these can be replaced with hardcoded values if you are in the development stage to speed up the process.
Fields |
Description |
Username |
MongoDB username. Input your username using Mule property placeholder syntax. |
Password |
MongoDB password. Input your password using Mule property placeholder syntax. |
Database |
MongoDB database. Input your database using Mule property placeholder syntax. |
Servers |
This location points to the default MongoDB instance, Input your endpoint using Mule property placeholder syntax. |
Setting up the Global Configuration with SSL (optional)
As of MongoDB Connector v4.0.0, we support the use of SSL. To setup the Global Configuration:
-
In the Global Element tab for your MongoDB connection, make sure you check SSL property field.
-
Remember, your instance must support this feature. For more information check MongoDB documentation.
Invoking an Operation
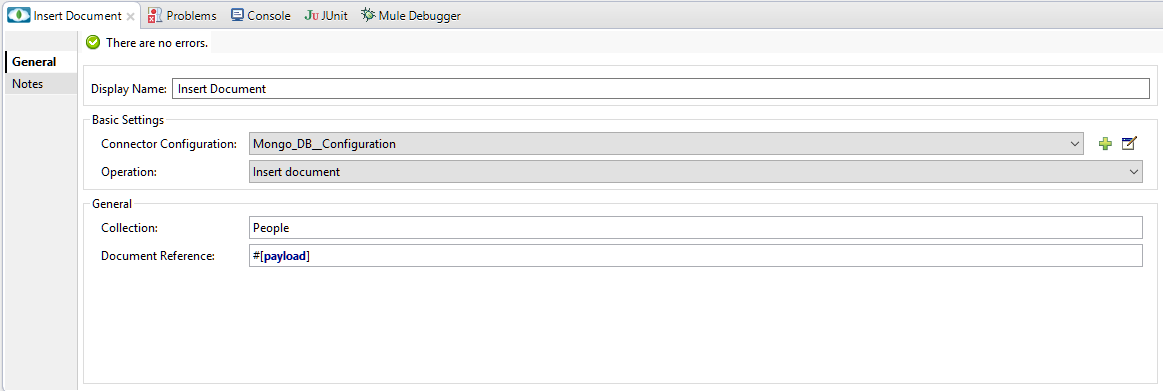
In order to invoke a simple operation (such as the insertDocument operation), you can follow these steps:
-
From the palette, drag and drop the MongoDB connector into your flow, by placing it between the HTTP connector and the MongoDB Transformer.
-
Configure the connector, by selecting the Connector Configuration Reference and the operation to invoke.
-
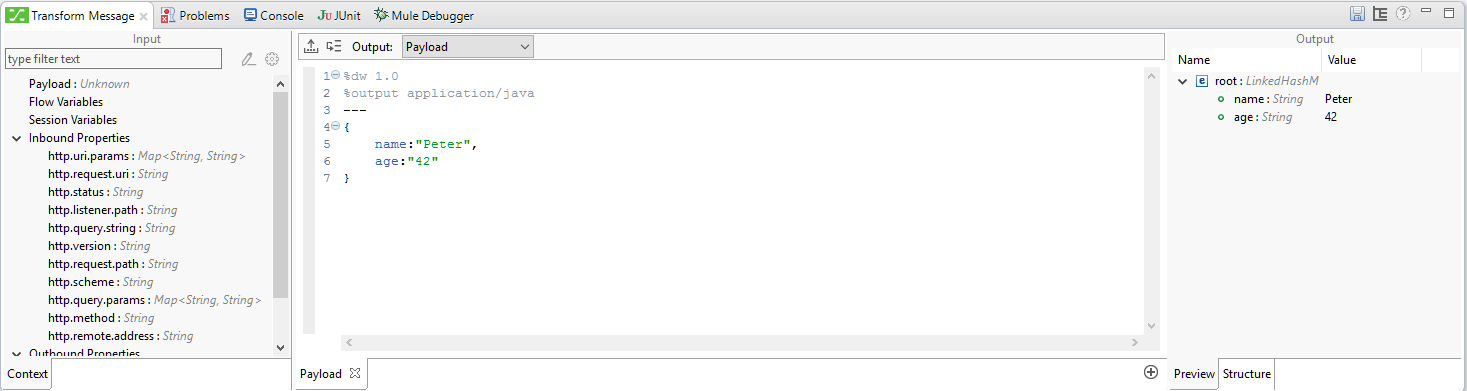
From the palette, drag and drop the Transform Message component, before the MongoDB connector
-
Click on it, and type { name:"Peter", age:"42" }
Final Flow
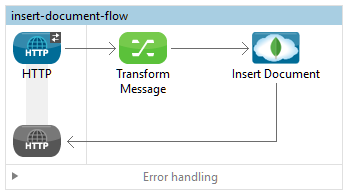
<flow name="insert-document-flow">
        <http:listener config-ref="HTTP_Listener_Configuration" path="/" doc:name="HTTP"/>
        <dw:transform-message doc:name="Transform Message">
            <dw:set-payload><![CDATA[%dw 1.0
%output application/java
---
{
    name:"Peter",
    age:"42"
}]]></dw:set-payload>
        </dw:transform-message>
        <mongo:insert-document config-ref="Mongo_DB__Configuration" collection="People" doc:name="Insert Document"/>
</flow>
See Also
For additional technical information, regarding MongoDB Connector please visit our online documentation. You may also want to access MuleSoft’s expert support team, for that you must subscribe to Mule ESB Enterprise and log in to MuleSoft’s Customer Portal.
For more information on MongoDB API, please visit their API documentation page